Friday, February 28, 2014

Background Stencils, Thank you's, and Goodbyes.

As dusk approaches our challenge comes closer to an end, so I thought this card was appropriate to close our month of girls night out.


I made this card using one of Dreamweaver's background stencils, it looks pretty neat when you use the pastes, but I love to use my distress inks and mix the colors, the tree is one of their dies that match the stencils which creates a pretty awesome effect.

Thank you Dreamweaver Stencils for sponsoring this fun challenge, love love all your stencils and the versatility of them, it's sad coming to the end of our teaming up, but I know we can all look forward to future challenges with you.

I know many of our entries were from those of you who already follow Dreamweaver's but to those of you who are new to these great products, I hope you will give them a try, I know you will love them!

Congratulations to our winners!
Terri, Greta, and Karen, I will be shipping of the prizes very soon, and come back March 2nd to see who will win the grand prize.  Everybody enjoy!

It is time to pass the baton to my fellow hostess Dawn, good by till we meet again in June.
Hannah And the DCD Team


Wednesday, February 26, 2014

Gone Wild with Dreamweaver Stencils

Die Cut Divas Sponsor for February
Current Sponsor


OK, I went wild with Dreamweaver stencils!  
I love using the paste on a dark background.  The wispy clouds are made with using PanPastel Titanium White.  They're perfect for this technique.    This card is my favorite of all the Sailboat cards I've done.

A gorgeous stencil that I've seen Paula use to good effect.  The "Thanks" card is colored with PanPastels.  The card on the right I used PanPastels to sponge over the Triangle Weave stencil.  I then sponged a VersaMark Ink pad randomly onto the Floral w Dots, (remove the stencil), then used Distress powders sprinkled on top and heat embossed.  I added a few more things to finish off my collage.

The panel that looks like clouds on which the stencil was applied is from a shopping bag from my LSS.  I used some think sheets of glitter paper to give it some pizzazz.

Arlene and the Die Cut Divas


Tuesday, February 25, 2014

I Can,Toucan

Dreamweaver Stencils, the sponsor of Die Cut Divas' blog and I love the many different ways you can use those wonderful stencils and pastes.
Hannah has let me pop in today to play hostess   The fun and rules are here..  I hope you've been playing "Girls Night Out too."  I'm just saying, I used PINK!
TIP
If you are using EMBOSSING PASTE.
1. Use removable tape to tape the stencil to the surface you will be embossing.
2. When spreading the paste across the taped stencil, start where you put down the first tape strip
3. You will be removing the tape in reverse order EXCEPT
4. Do NOT remove the last piece of tape yet, but
5. LIFT the stencil up (holding down the paper) as though it were on a hinge.  Your tape is the hinge
6. Now you can remove the stencil and tape
7. WASH the stencil  in soap and water immediately.  Wash on a flat surface so you don't bend the stencil
8. WASH the spreader at the same time.

See Stencils with Style to check out their stencils and embossing pastes.  Lots of tips and how to instructions..

This is a Dreamweaver stencil on which I spread the Dreamweaver Stencils embossing paste in white matte finish.  Please don't leave the stencil on while the paste is drying.  When the paste is dry (back does not feel cold anymore), put the stencil back on (if you want, you can use a strip of removable tape) and color with craft inks.  I used a small (SMALL) stipple brush to dab in the ink and brush on the raised areas.  The background is done on taskboard with Pan Pastels.  I used different colors of reds and greens and wiped Platinum over them to tone the colors down on the background.  The more you rub the Platinum, the shinier it gets.  The limb here looks purple, but it is brown.  I hope you like this.  I, myself, was so surprised at the wonderful results.

Tackboard is a non-warping natural wood product that is biodegradable, easy to cut and highly absorbent.  It creates strong bonds with any glue, can be sanded easily and accepts any water-based or solvent-based paint, stain or finish. You can apply any color of embossing paste.  It adheres best with liquid glues or strong 2-sided tape like Be Creative Tape.  Its unique pulp stratification allows forming over steam or after soaking in cold water.  It regains rigidity seconds after removal from steam or overnight if soaked.

Monday, February 24, 2014

Time for some Showcasing!


We have so many awesome entries this month and I wish I could share them all but here are just a few that really caught my eye.

Birthday Bling Gift Holder
I love this card made by Heather with the little gift pocket
 
And just look at the beautiful coloring done by Emily Shroom
 and the overall design of the card is fantastic!
 
This lovely creation is by Gini Cagle
 
I love the Elegance of this card made by Kailish
 
Of course if you want to see all of them just click on the current challenge above and see all the entries, and I'm sure everyone would love it if you could leave some nice comments too.
I'm enjoying seeing everyone cards! You all have some awesome entries!
Thanks for visiting come by again soon!
 
Hannah and the DCD Team.

Sunday, February 23, 2014

Add a Little Glitter and Bubble your Paste!


Our wonderful sponsor:
Current Sponsor

You can put glitter in your paste!  Try it.
I have loved using the Dreamweaver stencils.  Try them!  Not the flimsy little stencils, but sturdy metal stencils.  I'm still learning so many technicques.  Though you can't see the glitter.  I used some glitter in the paste for both of these cards.  A bit of Red Stickles on the berries for the first card adds a punch of color.

You can bubble your paste!
Can you see how bubbly the surface looks on the flower?  That's because I heated it with a heat tool to make it bubble.  This was my first attempt.  As you can see, I started at the bottom and wasn't so afraid as I neared the tops of the flowers.  You might give this a try AFTER the paste dries.  And I must say that I love Dreamweaver pastes.  I buy them at my LSS, The Stamp Art Shoppe in Roseville, California.

I hope you try this simple technique for something a little different.

Saturday, February 22, 2014

Announcing winner number 3!

Drum roll please, our 3rd winner is about to be chosen

 The lucky winner of this prize is......Karenladd!
 
 
Congratulations Karen!
please email us at thedcdivas@gmail.com with your postal address, and please note I'll not be mailing the prizes till the end of the month, so if I don't get your email right away I must wait till I have all 4 in order to ship,
 
Thank you and I hope you enjoy your new stencils.
 
 
 Hannah and the DCD Team

Friday, February 21, 2014

Best "Buddy" Night

This particular title was invented by my little brother Caleb,  when I stayed home with him while Mom and our sister Kirsten left for ballet class, just last year it became a monthly event where my little brother Caleb and sister Kirsten, each have a day where they had a day or evening with me that we spend together doing fun things,  Kirsten and I usually play games, do crafting, (usually beading, or card making), and watch a movie, and Caleb and I usually build Lego's, watch a movie, and tell stories.
Can you tell where I got my idea for this months challenge? :) lol.

  So I asked Kirsten to make a card for our challenge to share with you, and here is what we did together.


My Card
Every girl loves horses ( most anyway) and with me they are particular favorite,  when I saw this stencils at Dreamweaver's I had to have it, I love using the copper metallic paste with it.


Kirsten's Card
 Kirsten chose this lovely saying, as her focal piece, which I purchased from "our daily bread".


 Thanks for stopping by, come back tomorrow to see who will win the 3rd prize!
 
 Hannah and the DCD Team

Thursday, February 20, 2014

Hot Air Balloons - you never know where you'll see them!

I teamed a Dreamweaver stencil with a new Hero Arts stamp set that I think is just the coolest set.  If I'd received this before my son's birthday, I'd have made something to send to him as he is a very technical guy - a math teacher.  Since I put a pink bow on this, I'm not giving him this one, but don't you just love the way Dreamweaver plays with Hero Arts?  I would love to have this balloon floating across my screen.

The black surface is all glossy (coated with Glossy Accents).  I cut out the center and replaced it with the card stock with my Dreamweaver balloon.   A more modern style here.  As you can tell, on this cell phone, my camera is ready!

This Dreamweaver hot air balloon is a combination of different things.  I mixed glitter and some Distress Powder with my Dreamweaver embossing paste (matte white) and applied with the Dreamweaver speader. I then took my heat tool and bubbled the paste a bit, hard to tell from the shot.  I also covered a few rows with Xmas Red Stickles.  It was fun creating a vintage/modern look.

Hope you like this mixed up card.  Rather a fun one.

I was having so much fun, I made two more cards with this wonderful stencil.  I'm really into the Dreamweaver pastes.  Looking at them, it's a wonder I didn't try to taste the creamy goodness.  This balloon below is floating through the clouds overlooking the world.   I used my PanPastels on the balloon.

This balloon card was a strange evolution.  I painted a kraft card with Distress paints, let them dry, put the Dreamweaver Triangle Weave stencil on and sponged the VersaMark pad directly on top of some of the weave, scattered Tattered Rose Distress embossing powder on top and heated with a heat tool.  I then placed the Hot Air Balloon Dreamweaver stencil on top, applied a mix of Dreamweaver white paste and Tim Holtz Distress embossing powder.  When dry, I used a heat tool.  I wanted the two white panels to stand out more, so applied some PanPastel white. Red Stickles and some kraft die cuts with the words "hey" and "Take a Break" complete the card.   A strange but kind of fun card.  I just couldn't get a good shot of the kraft die-cuts.

Dreamweaver Hot Air Balloon here!

Arlene and the Die Cut Divas


Wednesday, February 19, 2014

Paint daubers and stencils

Ok before I share my card let me just say, this card is not what I planned on showing, I was running late preparing this post, so had to do something quickly, and I ran into a few issues like my paint (that  I never used) was dried out. This could have been much prettier had I the time to get it together, so please bare with me.

Using paint dauber with these stencils is very easy, and can create a very pretty look, the distress stains would make an even neater effect, which I would like to have shared but I only own 1 and it is picket fence which just looks like a white wash.

Anyhow I hope you get a chance to try your daubers with the stencils, normally it is very fun lol.

Hannah and the DCD Team.

Monday, February 17, 2014

Dies are for Decorating!


The possibilities with dies are endless, and that is one of the main reason's why I love them so much.
 Did you know that, Dreamweaver Stencils also carry die cuts to match many of their stencils?
I love this option! after you have used the stencil to make pretty designs you can come back and die cut it out, it really makes an image pop, and the detailing so intricate and beautiful, or you can use the dies with patterned paper and have a quilt block effect which is especially fun for those of you who add stitches to your cards.

Here I just used 1 sheet of patterned paper, and assembled on green cardstock, then I cut it out leaving an edge of the green.

Being an apron, it's a perfect emblem to use as a crafter so I put it up on my door with my "signature"
that I stamp on the back of all my cards, and the watermark on all my photos.  To do this I just typed it up in the same font I always use and cut it out on my silhouette, lined it up on an acetate sheet and laminated, and after cutting carefully around the letters I put some masking tape on the back to hold it in place.

 Hannah and the DCD Team

Saturday, February 15, 2014

Announcing our 2nd winner!

It's that time again, who will win prize 2?!

And the lucky winner of this prize is entry #26 Greta H!


Congratulations Greta!!!!!
please email us at thedcdivas@gmail.com with your postal address, and please note I'll not be mailing the prizes till the end of the month, so if I don't get your email right away I must wait till I have all 4 in order to ship,
 
Thank you and I hope you enjoy your new stencils.
 
 
 Hannah and the DCD Team

Friday, February 14, 2014

♥♥♥♥Happy Valentines day!♥♥♥♥


And Happy Birthday to our guest hostess Linda! 
It was so fun getting to know more about you, and I hope your Birthday is filled with "purple" goodness and lots of valentines,  your work is beautiful and a great inspiration for me personally and I'm sure many of our readers could say the same.  Thanks for such a fun week!

Ladies I know Linda would love you to stop by her blog, and leave her some comments and I'm sure she wouldn't mind some birthday wishes either

Happy Birthday to you
Happy Birthday Dear Linda.....
Happy Birthday to you!
Here are some Virtual B-day cards just for you

Arlene sends Birthday Wishes and clear skies from A Little of This and That.

From Dawn... a flower in purple (Dawn's World)

From Hannah


A word from Linda
"Thanks again - I've enjoyed being with the Divas this week!  I've met so many wonderful women through this fun hobby of paper crafting.  So, I hope you take this month's theme of 'Girls Night Out' to heart and make some time to enjoy your hobby!"


 Hannah and the DCD Team

Thursday, February 13, 2014

Hi there

Hi Lovelies,

I'm  here to share with you another card I've made with the LG611 Stone wall, LJ927 Floral with dots, & LL3028 Nouveau wisteria stencils.


To these gorgeous stencils I added a "Greeting Farm" stamped image & some die cuts.  I used Distress inks on the stencils & Copics on the girl.  I just love the way you can change the stone wall by starting half way down.  I can see Stone wall becoming one of my all time favourties.

Happy crafting every one

Wednesday, February 12, 2014

A Tutorial from our guest Linda

Hi all - I'm sharing a card with a new die cut I just bought: Lg Snowflake by Impression Obsession. It looked like an amazing die, then I opened the package and saw it was not a joined piece but 4 layered pieces. Had to play a lot with my Vagabond to get this thing to cut, especially in the center - did it with several shims and new cutting plates (my old ones were too warped). I didn't photo every step of my card construction but just took a few to show you how I worked.


First, here's a photo of the cut die alongside the metal die itself:
 
As you can see in the photo, it's a nice sturdy metal die - just needs a lot of pressure for the intricate bits. Next photo shows me separating the die into parts. I cut out 4 of them - white, light blue, kraft and glitterly aqua.

Next photo shows all the pieces laid out, just in the white - as you can see I tried to save a bunch of the little bits. You never know if they might come in handy...


I started playing around with a layout using a 6x6 piece of BoBunny Woodland Winter paper - love this collection! Because the snowflake is rather large, I decided to use a 6x6" square cardbase, so I cut down the blue piece to 5 & 9/16" square with a kraft mat of 5 3/4" square. See in this photo how I laid out the snowflake pieces and threw down a clear stamp to see if I liked it.
At this point, I hadn't added anything with the aqua glitter paper and you'll see how I changed up what parts I used from the snowflake! That's the creative process - I'm sure you all play around like this, moving things and trying others. In this next shot, you'll see I ended up embossing the JOY in white on a punched circle of pink patterned paper. I had totally forgotten that this month the DCD color is pink but I was playing around with this paper and thought it would look good with the blue! Anyway, you'll still see lots of bits and pieces of the snowflake, now in the multiple colors.
Then I started assembling my card - added the blue piece to the kraft mat, tied some string twine around it, added a felt Hero Arts snowflake, & pop dotted my sentiment. I added it all to my card base with foam tape. In this photo you'll see how I put a pearl where I wanted the center of my main snowflake since I had to take it off to add glue! I used glossy accents but had to work fast since it dries so quickly. Next time, I'd try a different glue.


Here's the final card:


And here's a companion card with more of the snowflake bits.  I had fun added some of the cutouts to the corners.  This is a wedding card for a winter wedding (neighbor girl just got married).  The sparkly aqua paper was used to cut out embellies for the guest tables so I had to use it in the card somewhere.

Thank you Linda for such a nice tutorial, the cards are gorgeous!
Linda mentioned to me that snow was very much on her mind when she was working on the tutorial due to still having snow on the ground and extremely low temperatures,  but I think it's perfect, it's still winter after all, and I'm also having much of that same kind of weather here in St Louis.
Also I wanted you to notice that little pink circle on her card, following along with our theme using pink.  If any of you are new to our challenges, no matter where or how you use a specific color as put up on the challenges it counts and can be entered.
Thank you all for stopping by Come back Friday for an extra special surprise post with our Guest Linda!
Hannah, the Die Cut Diva's, and Linda.

Monday, February 10, 2014

Introducing our Guest Designer Linda Wetterlin!

Hello Ladies,
Today I would like you to meet my friend and fellow crafter, Linda the Valentine Queen!
 Her words in purple( since it's her favorite color)
"Thanks to Hannah for inviting me to be a guest on Die Cut Divas blog this month!  I first met Hannah on the Hero Arts Flickr group, along with some other Divas like Arlene, Dawn and Paula.  Arlene is the one who encouraged me to join the Divas Flickr group which I promptly did in September 2009.  I'm more of a stamper so don't post there as often as I'd like, but I do use die cuts!  So, thanks again - I'm excited to be here this week!"

Hero Arts Chocolate (discontinued) folded card, Authentique and Doodlebug papers;  May Arts silk ribbon; Hero Arts stamps:  CL760 Happy Birthday Scroll  for the "Big Hugs",  CL586 for the xoxo, CL736 For Your Kindness for the flowers on heart #2, and DI065 Scalloped Heart Stamp and Die set exclusive for Archivers; Die cuts:  Spellbinders Resplendent Rectangles for the window, Hero Arts Stamp and Die for the scalloped heart, DI057 Layered Hearts for the second heart, Taylored Expressions Cupid's Arrows for the bottom 2 hearts; Hero Arts gems; Walnut Stain Stickles.

Tell us a little about yourself
I've lived in Minnesota for over 20 years but I was born and raised in Wisconsin - at least I've stuck close to the Mississippi River all these years!!  I work in a management group for a Federal agency which administers cash benefits.  In my spare time, besides card making, I sing baritone (a challenging harmony part) in a large Sweet Adeline chorus called City of Lakes Chorus (www.cityoflakes.org).  I sang in Chord Company quartet for 16 years but we retired a few years ago.  One of my best quartet memories is our 2006 trip to New Zealand, touring and singing along the way.  I enjoy my extended family which includes some long-time friends and my former quartet members. 
I remember watching a short video of your group it was quite good, and very harmonious, visiting New Zealand sounds awesome! and that is where our fellow hostess Dawn hails from
How long have you been a card maker/scrapper & when did you start?
I began stamping and scrapbooking in 2000 when my sister asked for my help with a project.  The first stamp I bought was a 2000 Hero Arts wood block sentiment “Take Time to Enjoy the Simple Things in Life” that I used to make bookmarks for a chorus craft boutique.  I still have that stamp - love the sentiment!!
I do too, good old Hero Arts!
Hero Arts Charcoal folded card; Doodlebug papers; Hero Arts sentiment stamp (white embossed) from CL748 You're So Kind; Lawn Fawn sequins; Dies:  Taylored Expressions Cupid's Arrows and more hearts from the Hearts Cutting Plate, along with various Silhouette cuts, including the Heart Stamp from card 2.  Oh and another HA stamp and die from card 1 but I cut the scallops off, Hero Arts heart gem.

I started making cards with stamps in 2007.  A coworker Bonnie invited me to a Stampin' Up party.  Of course I bought something to help her out, but I wasn't into making a bunch of the same card.  Bonnie became a friend and we began taking classes at Archiver’s (sadly a soon-to-close Minnesota based store).  That’s when I really started collecting stamps, mainly Hero Arts but some others carried at Archiver's.  I found the Hero Arts Blog in 2009 and pretty much went deep into card-making; the scrapbooking kinda fell by the wayside.  I was a Hero Hostess (a facilitator for their Flickr group) in 2011 and have been able to participate in several of the Hostess Blog Hops.

I'm so sad that archivers is closing down for good, that was my go to store for just about everything 😞
Do you follow sketches or dive right in?
I have used sketches when appropriate - such as for an online challenge.  In fact, my first Flickr upload was using a sketch by Shari Carroll (love Shari and her work - she has been a big inspiration).  Hero Arts used to have weekly contests and that was the first one I entered.  But no, as a general rule I don't go to a sketch for my cards.
How many projects do you make a week?
I am very busy with work and chorus so my crafting time isn't as much as I'd like!  I tend to make a list at the start of the month of cards I need and go from there - in an average month about 8, not including Christmas cards (I make about 40 Christmas cards for the year).
Not bad at all! That is better then I can do sometimes, I need to remedy that
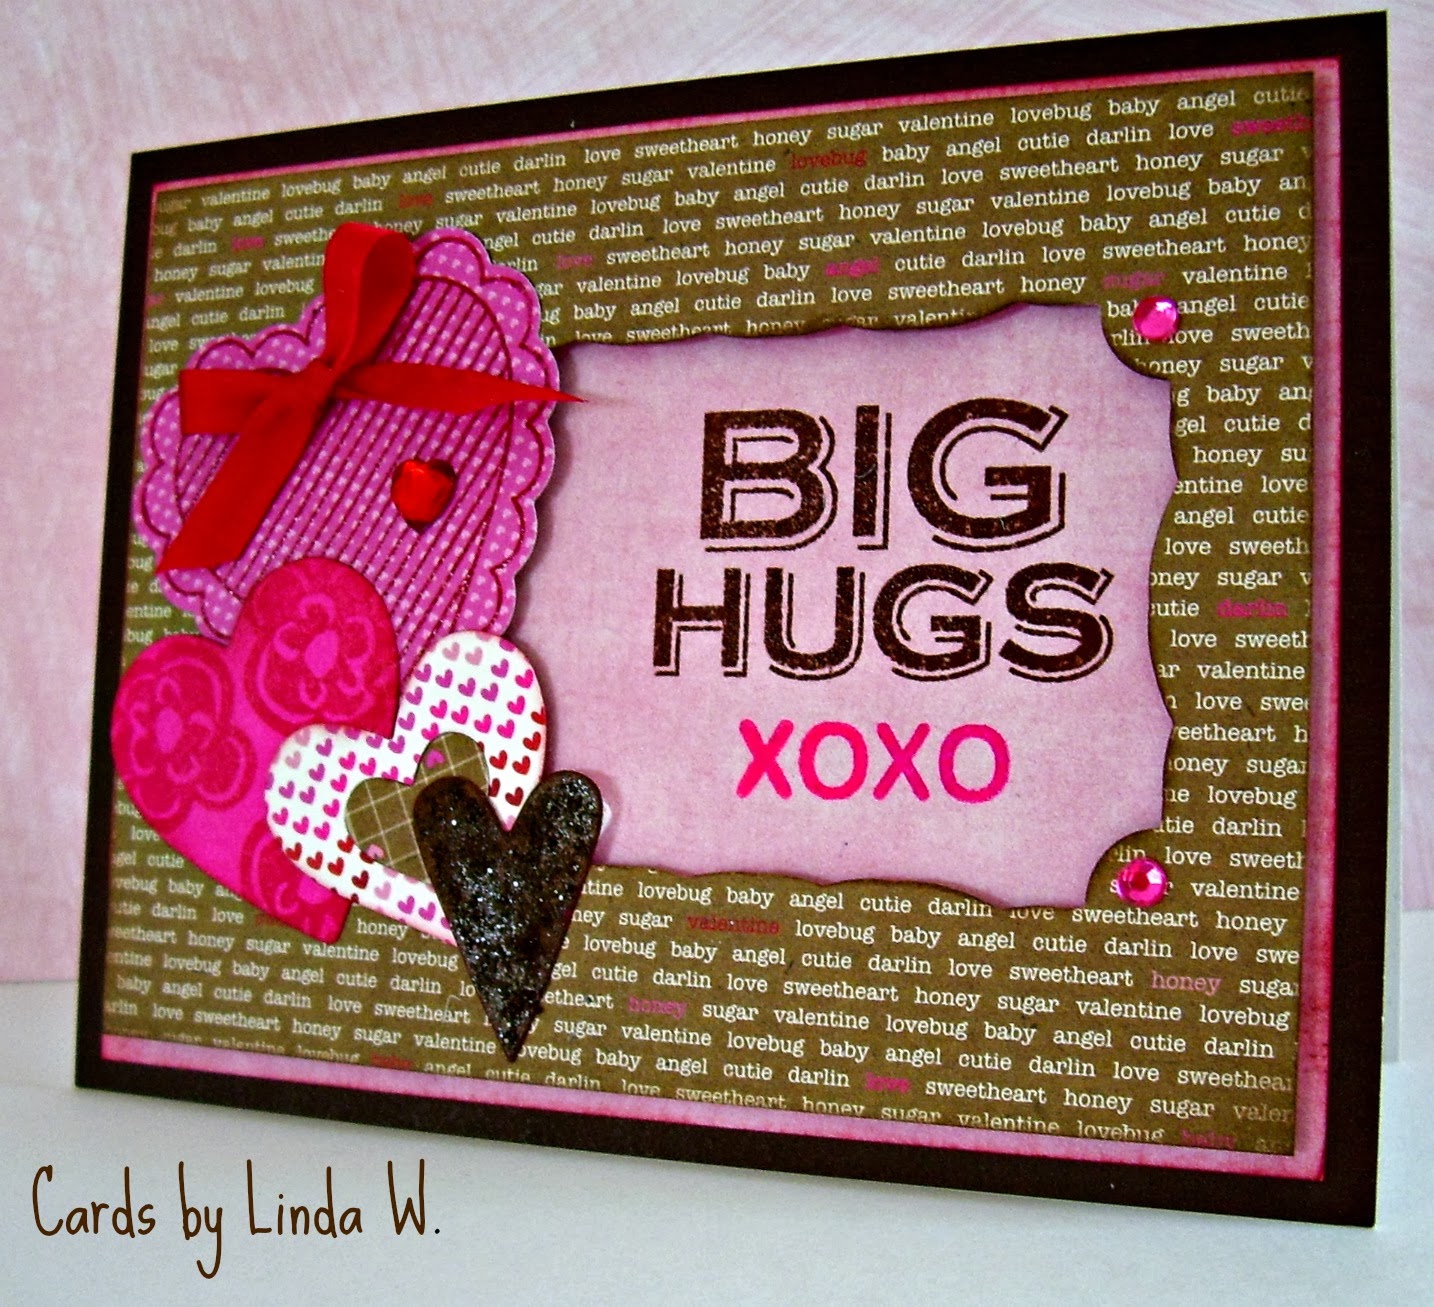
    Dotted kraft card base from Michaels; Bazzill, BoBunny, Hero Arts and Doodlebug papers;Taylored Expressions Hearts Cutting Plate die (cut three times - used the pink open hearts background and the hearts that popped out of 2 dotted cuts), Silhouette die cut file - Heart Stamp by Sweet Afton, Hero Arts heart gem.

What is your favourite tool (what can't you create without) & why?
I need a million tools, as evidenced by all the stuff I have in my house!   But I must say, I've been really pleased with my Fiskars ProCision™ Rotary Bypass Trimmer - just a great, straight cut and the blade is self-sharpening.  Love, love, love it and worth every penny I spent (of course, I used a coupon at Michael's for a good deal).
That sounds impressive, I will have to look into that
What at the moment is your most favourite thing to do on your project?
Lately, I've been feeling the love for SEQUINS!  Which is quite funny since I've been wearing sequins on my Sweet Adeline costumes for oodles of years!!  Just love sequins by Lawn Fawn - so many cuties, including leaves and snowflakes.
I never would have thought to use sequins, seriously! But that sounds really neat
How would you describe your style?
Hmmmm - I won't say "no style" since you have to have some, just to create!  But I don't stick to any particular thing - I'm more of an ecletic gal - and that goes for my taste in music too, btw, even if Barbershop style is my main musical love!
Sounds good to me
What about your style would you change (or not) & why
I would really love to develop a better sense of composition.  I've improved but I know there are guidelines I should employ for a better result.  I'm just happy to continue growing through the inspiration of all the talented women in the DCD and Hero Arts Flickr group.
Ditto! 
Have you been published or on a Design team - when & where?
No and no.  I sent a card in to some magazine - can't even remember the name - soon after I started card making.  I was so naive!!  I learned a lot from winning some Hero Arts challenges and realized that my first magazine submission was so lame!  My friend (and sister Hero Hostess from 2011) Heather (Heather Maria D on Flickr) and I decided in 2011 to try and get published.  Of course, she actually submitted and was published many times since.  I just never tried (sorry Heather).  I think a Design team would be such fun - so much camaraderie!  Maybe I'll try for one after I retire from work; I just can't add any more responsibilities right now.  I'm on our chorus Music Team (co-section leader for the Baritone group) and that keeps me busy too.
Same here, but we'll get to publishing eventually I hope, that is a goal (distant) for me
Describe (pictures are even better) your crafting area
Hate to say it, but I'm too embarrassed to share photos of my crafting area - or AREAS, as I tend to spread my stuff out throughout the house.  The only rooms that are safe are the bathrooms - LOL!  Oh, and one guest room has been totally purged of craft items.  Right now my Vagabound sits on a rolling organzer that has rolled its way into the family room.  My Silhouette sits on a TV tray beside a coffee table where my laptop sits in front of the television.  My poor dining table hasn't seen a meal on it in over a year - crafts overtook it, along with most of the kitchen table.  I have a home office/craft room but the supplies began to overflow it - yes I can walk in there, it just isn't pretty!  My family has accused me of hoarding craft supplies - now I wouldn't go that far, but I do have a lot.
But hey! at least you can do some form of crafting no matter what room you are in
Do you have a blog? If not where can we see more of your fabulous creations?
I do have a blog!  But I'm a bad blogger, meaning inconsistent.  I recently had 3 months where I didn't post at all - just too busy with other stuff!  But you can find me Scrappin', Stampin' & Singin': http://scrappinstampinsingin.blogspot.com/
Love the title!

Thanks Linda! It was great getting to know you more, dear readers, please check out her blog, and don't forget to come back Wednesday to see what she has for us.
Adieu

 Hannah and the DCD Team

Sunday, February 9, 2014

Scramble, Scramble

Hero Arts had a 90 minute scramble today and I got home from the Toastmasters' Leadership breakfast in time to participate.  You know how sometimes things come together and sometimes, time just blows by and you've got NOTHING.  Well, today, the colors inspired me.  I haven't used the color combo pink and silver in a long time.

I thought I had silver Distress Paint, but I didn't... however the brushed pewter looks silver to me, yet pewter too. I put up another photo of my card on Flickr which does not match the true color of the paper.  This photo directly below is the true color and you can see the note card has a silverish color as well as a great pattern.

I dabbed Distress Paint, Brushed Pewter, on the background and after it dried, I then used the Dreamweaver stencil to sponge Memento London Fog on some of the weave.  The pattern is from the Dreamweaver Stencil LJ912.Triangle Weave, which is one of my favorite stencil backgrounds.  I stamped a Hero Arts stamp K5517, in Distress Paint Brushed Pewter (stamp bought at Michaels), very similar to Silhoutte Grass, S5316 on the pink panel.  The Hero Arts sentiment, Butterfly and Flower set CL750 had this great sentiment which fit perfectly. The pattern of the weave on the silver is amazing and a bit hard to catch.


Not the true color, but perhaps you can see the pattern on the silver more.

This really is quite stunning.

Arlene and the Divas

Saturday, February 8, 2014

Announcing our first winner!


Good day readers! The time has come to give you our first winner,

And the lucky winner of this prize is...... Terri!


Congratulations Terri!
please email us at thedcdivas@gmail.com with your postal address, and please note I'll not be mailing the prizes till the end of the month, so if I don't get your email right away I must wait till I have all 4 in order to ship,
 
Thank you and I hope you enjoy your new stencils.
 
 
 Hannah and the DCD Team


Friday, February 7, 2014

Distress ink's and Stencil's an awesome combination


 My first "love" is distress inks so I had to find a way to use them together with the stencils, I especially like to use the ink for the backgrounds, but it works great for images too such as these horses,

 ...and probably the simplest of uses with the stencils, there is no difference in how you apply the ink you just put the stencil over the area you want covered holding it in place with tape (the removable kind that won't hurt the paper) and rub the ink applicator over it like you normally do, when you lift the stencils you will see the white area's where the stencil covered.
By the way the shading was a happy accident, I love how it looks like the horses have sunlight on them :-)

I'm currently in the process of using the distress inks to water color (one of the many things they can do) with the stencils, but I'm still having the trouble of the water running under the stencil, if I can get it mastered soon I will share it with you, if it weren't for the running the result would be beautiful, even some of my mess ups look very pretty still.


 Hannah and the DCD Team

Wednesday, February 5, 2014

Sail away

As long as I can remember I have been enamored at the sight of water, the way the sun hits it and it just glitters sometimes so much you can barely see, and the feeling of the cool breeze as the tide rolls in.
 I have only been "at sea" once when I was 8 and I still remember the gentle rocking of the boat, but I still get that same feeling on the river every year, when we get on the ferry from Missouri and cross over to Illinois.
All of this came rushing through my mind as I sat down to make this card,  and I think the stencil will become a fast favorite.


This was the first time I tried the embossing paste and the f/x powders together, and let me tell you!
The results are absolutely amazing, after I put the powder on and heated it, I was so amazed, not a single bit of the powder wiped off and it felt almost velvety to the touch,  hey it even looked good without the powder even on yet, I admit I was scared to try it at first, but so glad I did, so I hope you will give Dreamweaver's a try. The Owner and designer Lynell has some gorgeous examples on her website you may want to check out, click HERE to see.

I guess this stencil is a team favorite! Below my fellow Diva's have also found unique ways to use it.


Hi Lovelies, (it's Paula here.)  I have done another Canvas using four of the Stencils & tree die.  I just love the way this picture turned out.   To me it's a view from either a window or a veranda.  Because the stencils are so easy to use this didn't take very long to make.  I used Copics to colour everything except the lake & sky.  For those I used Distress inks.

Isn't it amazing how each one of us has used this stencil?  We knew we wanted to share this stencil with you, but not how we would work with it.  This is one of my all-time favorites.  Here's where you can find the Sailboat.  The sailboat and clouds are all glittery with Perfect Pearls.  Wish you could see the sparkle.
Arlene at A Bit of This and That.


And it's Dawn here for my sample.  I did some paste embossing with glitter over the top.  Add some pearlescent paints.  

Hope this gives you some inspiration
 

Hannah and the DCD Team

Monday, February 3, 2014

Happy Anniversary!

In June of 2008 the Die Cut Diva's Flickr group was born,  founded by Linda Regenboog, offering you monthly challenges, by 3 of our hostesses, Paula, Dawn, and Arlene,  each month they put up their time, effort, and money, to give hand picked prizes which they shipped all over the world to the lucky winner of the month.
In 2009 I joined as the 4th hostess and became part of the group,  finally in  August of 2010 our blog was born, and up till February of 2013 it was just a place where we shared random tips and some inspiration.

Nearing the end of 2012 we decided the blog wasn't worth having if we weren't going to keep up with it, so we talked and planned, and decided in order to keep it up we needed to move our challenges to the blog.  Behind the scenes, the blog was revamped and given a new image until it was ready to open in February of 2013.  Among all the changes, we looked into getting sponsors in order to be able to offer you bigger and better prizes from many of the much loved crafting sources, as well as introducing you to new ones, as we were still working on sponsorship.
February wasn't only a starting point for new things but also the end of  prizes offered from within the hostesses pocket books.
With a great start in February 2013, by March we had our first sponsor who was none other then the much loved Hero Arts, which is how we all met and got together in the first place, to bring you the Die Cut Divas.
 So without further ado we just wanted to thank each and everyone of our followers and those of you who have been with us from the beginning,  So happy 1st Bloggaversary!
And Thank you for all your support, your lovely entries, comments, and help in spreading the word making us what we are today, without you this couldn't have been such a wonderful place.


Hannah

The Die Cut Diva's
Hannah, Paula, Dawn and Arlene.